close
Choose Your Site
Global
Social Media
Views: 0 Author: Site Editor Publish Time: 2025-09-19 Origin: Site
Most people save between $100 to $300 by skipping the shop and doing the work at home.
Our company wants you to feel confident and safe during this process. With the right tools and a little patience, you can get the job done.
You can save $100 to $300 if you change your NOx sensor at home. You do not need to pay a mechanic for this job.
Get simple tools like an OBD-II scanner, a ratchet set, and safety gear before you start.
Follow easy steps to take out and put in the NOx sensor. Make sure you look for any wiring problems that could cause trouble.
Always use your scanner to clear error codes after you finish. This helps your car work well.
Check your NOx sensor every four years to keep your engine working right. This also helps you follow emissions rules.
You might wonder if you can handle a nox sensor replacement on your own. The answer is yes! Many car owners like you have taken on this job and succeeded. Modern vehicles make it easier than ever to access and swap out parts. If you have some basic tools and a little patience, you can do it at home. You do not need to be a professional mechanic. You just need to follow the right steps and pay attention to safety.
You will save money and learn more about your car. Most people find that the hardest part is getting started. Once you begin, you will see that the process is straightforward. You do not need fancy equipment. A few hand tools, a safe workspace, and a diagnostic scanner will help you get the job done.
Tip: Always let your car cool down before you start working on the exhaust system. Hot parts can burn you.
Let’s break down the main steps you will follow when you replace a nox sensor in a car made after 2020:
Disconnect the cable from the electronics module. Use a screwdriver to lift the small grey sliding clip.
Remove the two 10mm nuts to unbolt the electronics module.
Take out the front nox sensor. If it feels stuck, you can heat the threaded plug to loosen it.
Use a nox sensor removal tool for extra help if needed.
Clean the sensor ports with brake cleaner if you see any dirt or buildup.
Remove the AdBlue injector and check for urea crystal blockages.
Refit the AdBlue injector using a new clamp. This makes installation easier.
After you finish, clear any diagnostic codes with your scanner.
You can see that each step is clear and manageable. If you follow these steps, you will have your new nox sensor working in no time.
You might wonder what a nox sensor does in your car. This small device sits in your exhaust system and keeps track of harmful gases. It helps your engine run cleaner and protects the environment.
The NOx sensor works by detecting NOx levels in the exhaust stream and providing feedback to the engine control system, which then adjusts fuel injection and exhaust gas recirculation rates to reduce NOx emissions.
The NOx sensor is a key part of this system, which also includes the SCR catalyst, Diesel Particulate Filter (DPF), and turbocharger amongst others. If the NOx sensor detects too much NOx gases being emitted, it sends that information to the SCR system, which then adjusts the output to a level that’s compliant with emission regulations.
Your car uses this sensor to make sure it meets strict rules for air pollution. You help keep the air cleaner every time your nox sensor works as it should.
You need to replace your nox sensor when it stops working right. A faulty sensor can cause your car to pollute more and fail emissions tests. You might also notice your engine does not run as smoothly.
Here are some reasons why the sensor fails:
Contamination from oil, soot, or other residues can build up and block the sensor.
Excessive heat from the exhaust can damage the sensor over time.
Electrical faults like wiring problems or loose connections can stop the sensor from working.
Wear and tear happens after years of use. Most sensors last about four years before needing replacement.
If you keep your sensor fresh, you help your car stay legal and run better.
You can spot a bad nox sensor by watching for these signs:
Check Engine Light (CEL) comes on.
Your car uses more fuel than usual.
Engine feels weak or slow when you press the gas.
You see extra smoke coming from the exhaust.
Your car fails an emissions test.
If you notice any of these problems, it is time to check your nox sensor.
NOx sensors monitor nitrogen oxide emissions in real-time. They provide data to the engine control unit for adjustments to minimize emissions. Compliance with regulations like Euro 6 and Tier 2 is achieved through the feedback from NOx sensors.
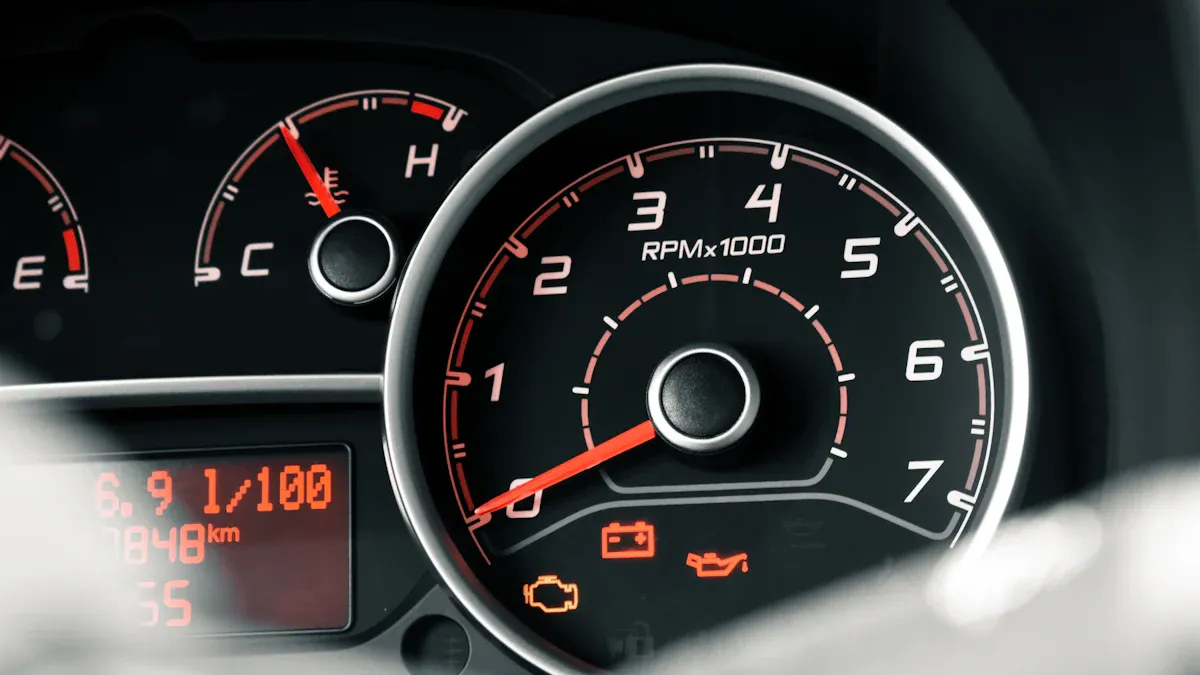
You need to start by figuring out which nox sensor is causing trouble. Most cars have more than one. Usually, you find one before the SCR catalyst and another after it. Your car’s computer stores trouble codes when something goes wrong. You can use an OBD-II scanner to read these codes. This tool tells you if the problem is with the front or rear nox sensor.
Sometimes, you see a check engine light or get a warning about emissions. If you want to be sure, you can check the sensor’s wiring and connections. Here’s a simple table to help you test the sensor and wiring:
Step | Action | Expected Result |
|---|---|---|
1 | Measure resistance of NOx sensor wiring harness | Should be > 1MΩ |
2 | Check connectivity between sensor and ECU | Should show conductivity |
3 | Measure resistance of sensor terminals | Should be > 1MΩ |
4 | Measure resistance between sensor pins | Should be within 26~29 Ω |
5 | Measure voltage at sensor wiring harness | Should be between 16V ~ 36V |
6 | Visual inspection of sensor connector | No bent pins or moisture present |
Tip: Always check for bent pins or moisture in the connector. These small issues can cause big problems.
If your readings do not match the expected results, you have found the faulty nox sensor. Now, you can move on to the next step.
Before you start the nox sensor replacement, gather everything you need. This makes the job smoother and safer. Here’s a checklist to help you get ready:
OBD-II scanner (for reading and clearing codes)
Ratchet and socket set (10mm socket is common)
NOx sensor removal tool or oxygen sensor socket
Torque wrench
Screwdrivers
Brake cleaner
New nox sensor and module (make sure it matches your car)
Gloves and safety glasses
Safety First: Always wear gloves and eye protection. The exhaust system gets hot and dirty.
You might need a jack and jack stands if the sensor sits under the car. Make sure your car is parked on a flat surface and the engine is cool before you start.
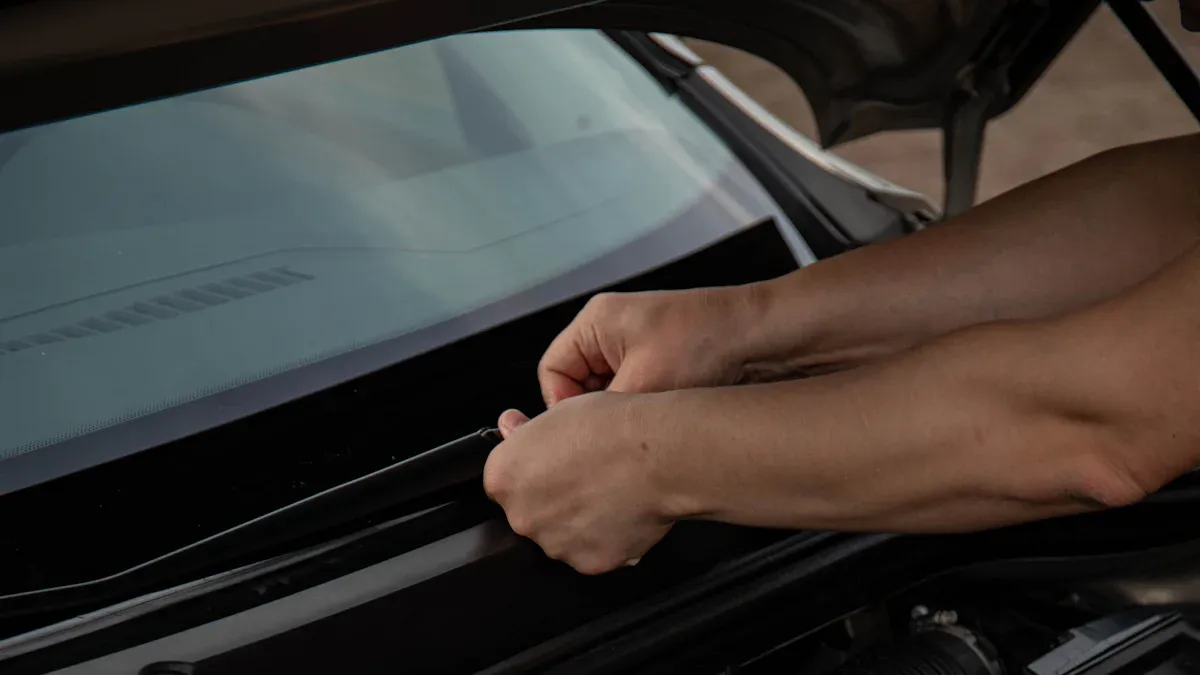
Now, you are ready to remove the old nox sensor and its module. Start by disconnecting the battery. This keeps you safe from electrical shocks. Next, find the sensor. It usually sits in the exhaust pipe, either before or after the SCR catalyst.
Follow these steps:
Unplug the electrical connector from the nox sensor module. Use a screwdriver to lift the locking tab.
Remove the two 10mm nuts that hold the module in place.
Use the nox sensor removal tool or an oxygen sensor socket to loosen the sensor. If it feels stuck, spray a little penetrating oil and let it sit for a few minutes.
Carefully unscrew the sensor from the exhaust pipe. If it still will not move, you can gently heat the area with a heat gun to help loosen it.
Troubleshooting: If the sensor feels seized, do not force it. You could damage the threads in the exhaust. Take your time and use the right tools.
Once you remove the sensor and module, inspect the sensor port. Clean it with brake cleaner if you see dirt or buildup. This helps the new sensor work better.
You are ready to install the new nox sensor and module. Make sure the new parts match your old ones. Check the part numbers before you start.
When you install the sensor, you need to tighten it to the right torque. This keeps it from leaking or coming loose. Here’s a table with common torque specs:
Sensor Type | Torque Specification (ft-lbs) | Installation Method |
|---|---|---|
M18 | 26-33 | Tighten by hand, then 1/2 to 1 full turn with wrench |
M12 | 13.2–17 | Finger tight, then 3/4 to 1 turn with wrench |
Start by threading the sensor in by hand. This helps you avoid cross-threading. Once it feels snug, use your torque wrench to finish tightening. If you do not have a torque wrench, follow the “hand tight, then turn” method in the table.
Mount the new module with the 10mm nuts. Make sure it sits firmly in place.
Note: Do not use anti-seize on the sensor threads unless the manufacturer says it is okay. Some sensors come with a special coating.
Now, plug the electrical connector back into the new nox sensor module. Listen for a click to make sure it locks in place. Double-check that the connector sits tight and the wires do not get pinched or twisted.
If you removed any other parts, like the AdBlue injector, reinstall them now. Use a new clamp if needed. This helps prevent leaks and keeps everything secure.
Tip: Take a photo before you unplug anything. This makes it easier to remember where everything goes.
After you finish the nox sensor replacement, you need to clear any error codes from the car’s computer. Use your OBD-II scanner for this step. Plug it into the port under the dashboard. Follow the scanner’s instructions to erase the codes.
Some cars need a relearn procedure after you replace the sensor. This helps the engine control unit adjust to the new sensor. Check your owner’s manual or repair guide for the exact steps. Usually, you start the engine and let it idle for a few minutes. Sometimes, you need to drive the car at certain speeds or temperatures.
Warning: If you skip the relearn step, your car might not run right. You could see the check engine light again.
The last step is to check the fuel trim. This tells you if the engine is running too rich or too lean. Use your OBD-II scanner to look at the fuel trim values. Good values mean your new nox sensor works well.
If you see numbers that are too high or too low, you might have another problem. Double-check your work. Make sure all connections are tight and the sensor sits in the right spot.
Pro Tip: Write down your fuel trim numbers before and after the repair. This helps you spot changes and catch problems early.
You have now finished the nox sensor replacement. You replaced the faulty sensor, installed the new one, and checked your work. If you followed each step, your car should run smoother and cleaner.
Sometimes, you try to remove a nox sensor, but it just will not budge. This happens a lot because the sensor sits in a hot, dirty spot on your exhaust. You do not want to force it and risk breaking something. Instead, try these steps:
Spray a good penetrating oil like PB Blaster or Liquid Wrench on the sensor threads.
Wait a few minutes to let the oil work.
Use a special O2 sensor socket for a better grip.
If the sensor still will not move, gently heat the area with a torch.
If the bolt is stripped, use an extractor bolt set.
Here’s a table showing how much force you need to remove a sensor with different oils:
Penetrating Oil | Strength (pounds) |
|---|---|
No Oil used | 516 |
WD-40 | 238 |
PB Blaster | 214 |
Liquid Wrench | 127 |
Kano Kroil | 106 |
50% ATF - 50% Acetone mix | 53 |
You can see that using the right oil makes a big difference. The chart below shows this even better:
Tip: Always let the sensor cool before you try to remove it. Hot metal can burn you.
Wiring and connector issues can cause your nox sensor to stop working. You might see broken wires, melted plastic, or loose pins. Sometimes, water or dirt gets inside the connector and causes corrosion. These problems can stop the sensor from talking to your car’s computer. When this happens, you might notice higher emissions or the check engine light.
Check the wiring and connectors for damage. Look for bent pins, green corrosion, or broken insulation. If you find a problem, fix it before you install a new sensor.
You replaced the nox sensor, but the error code will not go away. This can feel frustrating. Sometimes, the problem is not the sensor itself. It could be a wiring issue, a bad connector, or even a problem with the car’s computer. Always clear the codes with your OBD-II scanner after you finish the repair. If the code comes back, double-check your work. Make sure all connections are tight and clean.
If you keep seeing the same code, check for hidden wiring problems or try a relearn procedure.
A good diagnostic tool makes your job much easier. Tools like the ZEUS® Car Diagnostic Tool or Delphi’s BlueTech VCI can read fault codes for the nox sensor. High-quality OBD-II scanners, such as the Foxwell NT710, show live data from the sensor. This helps you spot problems that come and go. These scanners can read codes like P2200 to P2225, which tell you exactly what is wrong.
Use your scanner to watch real-time data.
Look for codes that match nox sensor problems.
Use the tool to clear codes after repairs.
Using the right tool saves you time and helps you fix your car the first time.
You made it to the end! Replacing a NOx sensor takes patience, but you can do it. Always keep safety first and double-check your work. Here are some final checks to make sure your repair worked:
Read fault codes with your scan tool.
Watch live data to see if the sensor responds.
Run a dynamic test to compare sensor readings.
You might face challenges like tricky diagnostics or hot cables, but you gain peace of mind and better reliability with new parts:
Challenges | Benefits |
|---|---|
Complex diagnosis | Peace of mind |
Damaged cables from exhaust heat | Long-term reliability |
High replacement costs | Warranty options |
Refurbished parts may fail | Better compliance |
If you have questions or want to share your story, drop a comment below. Many DIYers ask about recurring issues, sensor faults, or how to spot the bad sensor. Helpful resources and forums are out there if you need more support!
Most NOx sensors last about four years. If you see warning lights or notice poor engine performance, check the sensor sooner. Always follow your car’s maintenance schedule.
You can drive for a short time, but it is not safe for long. Your car may pollute more and lose power. Fix the sensor as soon as possible.
Some cars need a relearn or reset after you install a new sensor. Use your OBD-II scanner to clear codes and follow your car’s instructions.
You need a ratchet, socket set, NOx sensor socket, OBD-II scanner, and safety gear. A torque wrench helps you tighten the sensor correctly.
A working NOx sensor helps your engine run better. You may notice smoother driving and better fuel economy after replacement.